
For ease of viewing, we have broken down the Formatic Instructional video into segments that cover an individual topic of the machine’s installation and/or operation. To access those segments, simply click on the links below.
Identifying all the main components and accessories of your machine
The Formatic comes with a variety of included parts and accessories. It is important when assembling, operating or maintaining this machine that end users identify all of the parts and accessories they will be interacting with. This will help avoid damage and ensure an efficient installation and production flow process. The video below highlights each of those accessories.
Tools & Accessories
Contained within a large document sized envelope you will find the following parts & accessories:
Machine & Hopper Components
The following are parts and accessories for the rest of machine, including the hopper:
Hopper and paddle installation
The video below highlights installation of the Formatic Hopper. This includes installation of the paddles, hopper seal, hopper base, as well as the corresponding funnel lid.
Step 1
Ensure the hopper seal is facing grooved side up.
Step 2
With the grooved side still facing updwards, insert the hopper seal into the hopper – ensuring it is firmly in place.
Step 3
Install the hopper paddles with the larger, bottom paddle being installed first.
On the underside of the bottom paddle you will notice a notch within the center hub. This notch must align with the notch on the paddle shaft.
Now install the upper paddle, ensuring the notch on the upper paddle is aligned with the notch on the bottom paddle.
Finally, secure the paddles to the shaft with the larger paddle knob. (The smaller knob is used for securing the conveyor belt assembly.)
Step 4
Place the hopper over the paddle assembly. Ensure the indexing pin (located at the bottom of the hopper) is shifted towards the left. This is crucial for drum installation.
Step 5
Place the hopper funnel and lid on top of the hopper. Make sure the hinge located on the bottom of the lid aligns with the pin located on the upper rear side of the hopper. The magnetic safety located at the bottom of the hopper lid must align with the machine in order to ensure operation.
The issues highlighted below are common issues we discuss with clients during technical support interactions.
Indexing Pin
Ensure the indexing pin (located at the bottom of the hopper) is shifted towards the left. This is crucial for drum installation.

Magnetic Safety
The magnetic safety located at the bottom of the hopper lid must align with the machine in order to ensure operation.

Installation of the conveyor belt and arm assembly
The video below highlights installation of the Formatic Conveyor Belt Assembly. This includes placement of the blue conveyor belt onto the assembly arm, and securing the assembly arm to the machine.
Step 1
Ensure the groove on the underside of the blue conveyor belt align with the grove of the belt drive.
Step 2
With the blue conveyor belt over the conveyor arm, install so that the metal arm aligns with the shaft, and the blue conveyor belt with the belt drive.
Step 3
Secure the conveyor arm to the machine using the conveyor belt assembly knob. (This is the small knob. The larger knob is used for securing the hopper paddles as previously outlined.)
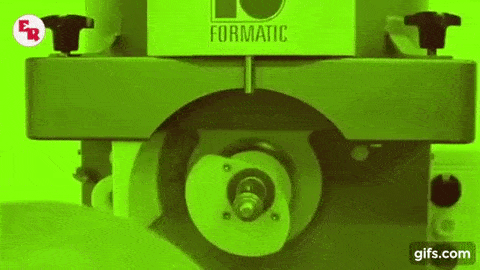
Installation of the forming drum
The video below highlights installation of the Formatic drum. It is extremely important that the end user follows instructions verbatim as to avoid damage to both the machine and drum.
Step 1
Position the hopper so that the indexing pin is positioned to the left-hand side of the machine. This will help avoid damage to the drum. The drum will not fit with the indexing pin centered onto the machine. Forcing the drum to fit will cause damage to both your machine and drum. This resulting damage is not covered under warranty.

Step 2
Ensure the notch on the drum gear is facing upwards by manually rotating the hopper paddles in a counter-clockwise direction. This should be done with the machine unplugged for added safety.
Step 3
Align the drum gear with the center shaft of the drum. Proceed to install with the drum facing forward.
Step 4
Once placed onto the machine you will notice that the drum protrudes past the drum housing. Complete installation by pressing both the upper and lower pistons in unison. This will ensure that the drum is recessed within that housing.
Step 5
Place the papering cam in front of the drum and fasten counter-clockwise with the drum knob. This will serve as a cover for the drum.
Step 6
Reposition the hopper so that the indexing pin is centered in front of the drum and fasten all four hopper knobs.
Step 7
Insert the drum scraper into the port and fasten with the built in port screw. Verify installation once fastened, by tugging on the drum scraper. It should not be able to move when tugged.
Step 8
Verify drum and paddle installation by conducting a dry run without dough.
The issues highlighted below are common issues we discuss with clients during technical support interactions.
Indexing Pin
The drum and/or machine can become severely damaged if the indexing pin is not properly aligned. Ensure the indexing pin (located at the bottom of the hopper) is shifted towards the left. The drum should NEVER have to be forced into the machine.
Drum Recessed Within Housing
Failure to ensure the drum is completely recessed within the housing can also lead drum and/or machine damage. Complete installation by pressing both the upper and lower pistons in unison. This will ensure that the drum is recessed within that housing.

Adjusting the weight or thickness of your product
The video below highlights adjustment of depth on your Formatic drum. The depth of your Formatic drum controls both weight and thickness of your final product.
Step 1
Loosen the thickness/weight control cam.
Step 2
Proceed to adjust the thickness/weight control cam until the desired piston depth/thickness is achieved.
If adjusting weight, simply perform adjustments (as mentioned above) and check machine deposits via a scale. Continue to adjust until the desired weight range is achieved.
Step 3
Once the desired settings are configured, tighten the thickness/weight control cam.
Adjustment of the drum scraper wire
The video below highlights adjustment of your Formatic’s drum scraper attachment.
Step 1
Remove the port cover located on the left-hand side of the machine.
Step 2
Use the included allen/hex key to adjust the distance between the drum scraper wire and the piston.
With the drum piston protruding from the drum, the scraper wire should touch the piston. This is the optimal setting. If positioned too far from the piston, the dough will not be effectively deposited.
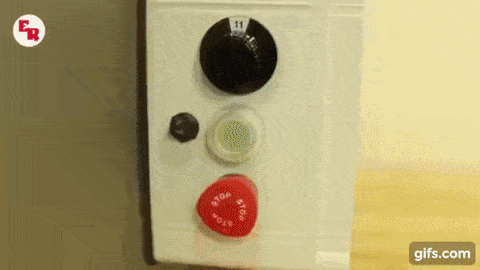
An overview of the operational controls
The video below highlights the various operational controls of your Formatic.
Green Button
This turns the machine on.

Red Stop Button
This turns the machine off. Once pressed the button must be released before the machine will turn on again.

Foot Control Toggle
This controls operation of the Foot Control Pedal. When switched in the up position, the machine will run in a continuous automatic mode. When switched in the down position, the machine will only deposit when engaging the Foot Control Pedal. Regardless of whether in automatic or foot control mode, the on button must be pressed in order to begin production.


Speed Control
This dial controls the production flow by adjusting the speed at which the belt moves and drum rotates. The lower the number on the dial, the slower production. The higher the number on the dial, the quicker production.

An overview of the Formatic in production
The video below highlights the Formatic producing chocolate chip cookies.
Step 1
Load the hopper with dough.
Step 2
Close the hopper lid.
Step 3
Flip the Foot Control toggle upwards for continuous automatic operation or downwards for operation with the Foot Control Pedal, then press on.
An overview and how to dismantle and clean your machine
The video below highlights the dismantle and cleaning process for the Formatic.
Step 1
Once production is finished, proceed to dismantle the entire machine.
Step 2
The drum, paddles, hopper, hopper lid, gaskets/seals, and conveyor assembly can be hand washed with warm water and mild dish detergent. Do NOT use a commercial dishwasher or extremely hot water temperatures as this may cause warping and/or additional damage to the components.
Step 3
Proceed to wipe down the remaining components of the machine with a sanitizing solution. Be sure to pay careful attention to the hopper and drum housing areas.
The issues highlighted below are common issues we discuss with clients during technical support interactions.
Cleaning
It is absolutely imperative that you clean all of the crevices of the machine in which product may accumulate during the forming process. The most common areas where this may happen includes: the hopper area, the crevices surrounding the drum housing, and behind the drum gear.
Damage related to improper maintenance or lack of cleaning is not covered under warranty.

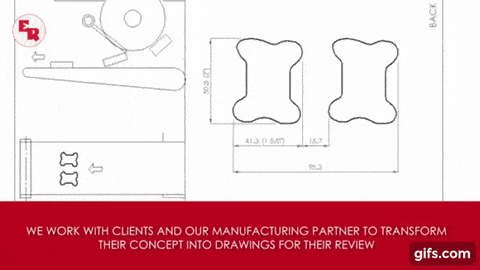
An overview of custom forming drum options
The video below highlights just a small variety of available custom drum options for your Formatic.
Custom Drum Development
The Formatic has the ability to be coupled with an infinite assortment of custom drum options. We work with clients and our manufacturing partner, Deighton to transform a design concept into a technical drawing. Upon approval, this drawing is then queued into production to become your Formatic drum.
Typical turn-around time is 4 – 6 weeks from the date of approval of the submitted technical drawing.
An overview of the various dough types and particulates
The video below highlights just a small variety of dough types and particulates that can be processed using the Formatic.
Dough Types & Inclusions
The Formatic is capable of processing a wide variety of cookie doughs both with and without inclusions. Some common includsions include: chocolate chips, chocolate chunks, oats, nuts, berries, and more.
We also offer clients an opportunity to test their specific recipe prior to purchase. To learn more about our sales consulting process please click here.
An overview of the assembly and operation of the papering attachment
The videos below highlight both installation and usage of the papering attachment on the Formatic.

Our office will be closing early on Wednesday, December 24, 2025, and remain closed on Thursday, December 25 and Friday, December 26 in observance of Christmas. 🎄🎅
 BAKERY EQUIPMENT
 EMAIL NEWSLETTER
 Bakery Equipment
 parts, repairs